how to smooth concrete after it dries: 7 techniques to make rough concrete smoother
"How to Smooth Concrete After It Dries" is a comprehensive guide designed to help you achieve a smooth surface on rough concrete.
Whether you're working on a small-scale home renovation or a large commercial space, there are several effective techniques for making concrete smoother and creating an even surface.
In this guide, we'll explore the top 7 methods for concrete smoothing, including grinding concrete, sanding and buffing, applying a self-leveling compound, using a concrete overlay, performing patching and repair, polishing the surface, and opting for concrete resurfacing.
Each method offers unique benefits for creating a smooth concrete surface and can be tailored to your specific needs, ensuring a beautiful and long-lasting result.
1. How to Make Concrete Surfaces Smooth Using a Concrete Grinder
Grinding your existing concrete is an effective method for making concrete smooth by removing imperfections, leveling high spots, and achieving a smooth finish.
Two common ways of grinding concrete are large walk-behind grinding machines and hand-held concrete grinders. Here's how to use both of these tools to achieve a smooth concrete surface:
Large walk-behind grinding machines:
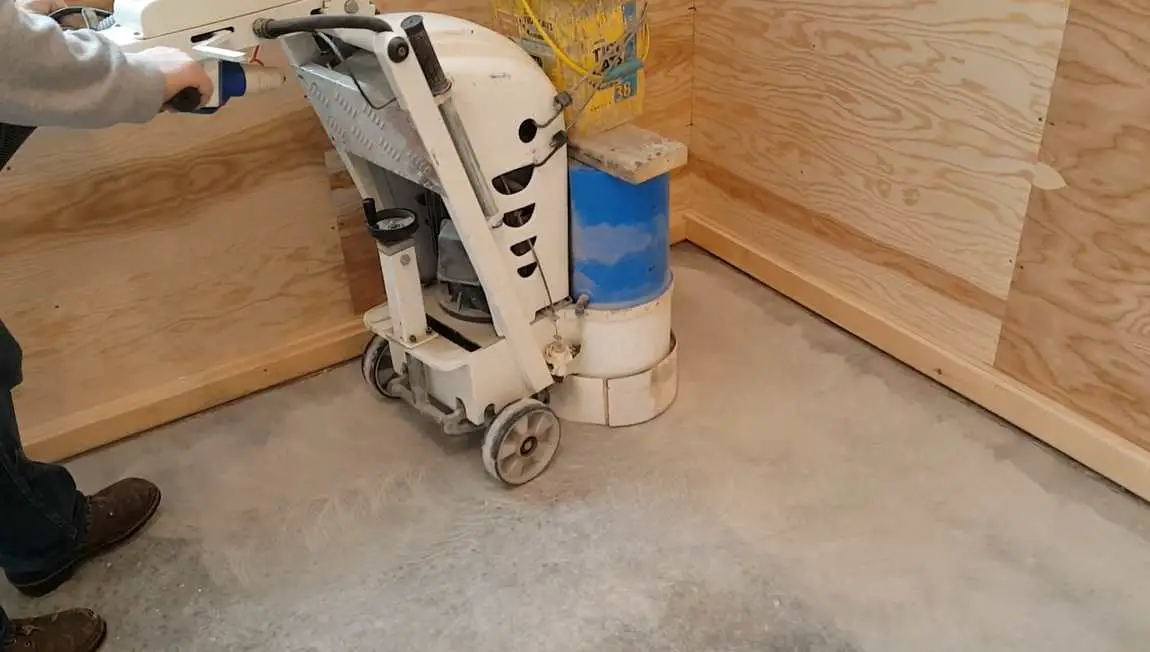
- These machines are designed for larger surfaces and are typically used to smooth a commercial concrete floor, a basement floor, or a garage floor.
- To use a walk-behind grinder, start by choosing the appropriate diamond attachment, which will be determined by the hardness of the concrete and the desired level of smoothness.
- Coarse diamond attachments (around 30-40 grit) are used for smoothing rough concrete, while finer grits (80-150 grit) are used to achieve a smoother finish.
Begin by attaching the chosen diamond segment to the grinder, making sure the machine is turned off and unplugged during this process. Once the attachment is secured, plug in the machine, and start it up.
Hold the grinder with both hands and guide it across the entire surface in a slow, steady motion, overlapping each pass slightly. It is important to keep the grinder moving to prevent creating divots or uneven spots.
Repeat the process with progressively finer diamond attachments until the desired level of smoothness is achieved.
Hand-held concrete grinders:
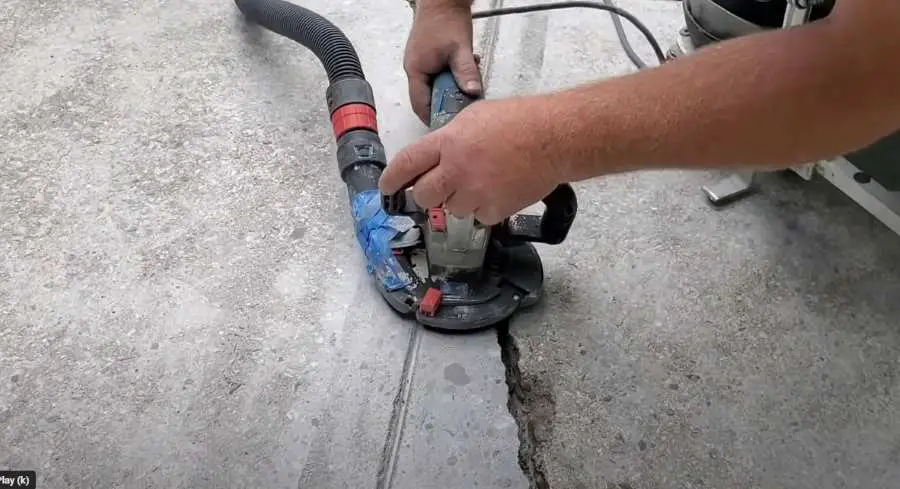
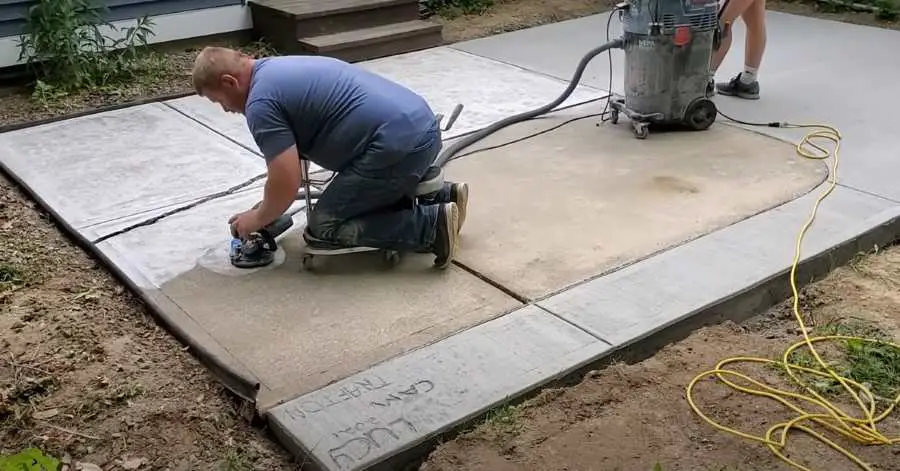
- These smaller, portable grinders are ideal for a small concrete slab, sidewalks, patios, repairs and patching, or tight spaces where a large walk-behind machine is not practical.
- Hand-held grinders also use diamond attachments, and the same grit range applies. Choose the appropriate attachment based on the condition of the concrete and the desired outcome.
Attach the diamond segment to the hand-held grinder, ensuring the tool is turned off and unplugged during this step. Once the attachment is in place, plug in the grinder and turn it on.
Hold the grinder firmly with both hands and apply even pressure as you guide it over the dry concrete surface, moving in a circular motion.
Work in small sections, and overlap each pass slightly to ensure a uniform finish. Similar to the walk-behind grinder, switch to finer grit diamond attachments as needed to achieve the desired level of smoothness.
PRO TIP: For both of these dry grinding methods, it's better to use a HEPA vacuum and attach it to the grinders to minimize the dust created by grinding. Both types of grinders can be equipped with a dust shroud for connecting to most types of vacuums.
In both cases, be sure to wear appropriate protective gear, including gloves, safety glasses, and a dust mask, to protect yourself from dust and all the debris generated during the grinding process.
2. How To fix rough Concrete By Sanding or Buffing
Sanding and buffing are methods used to smooth concrete surfaces, particularly for a smaller concrete project or an area that requires a very smooth surface.
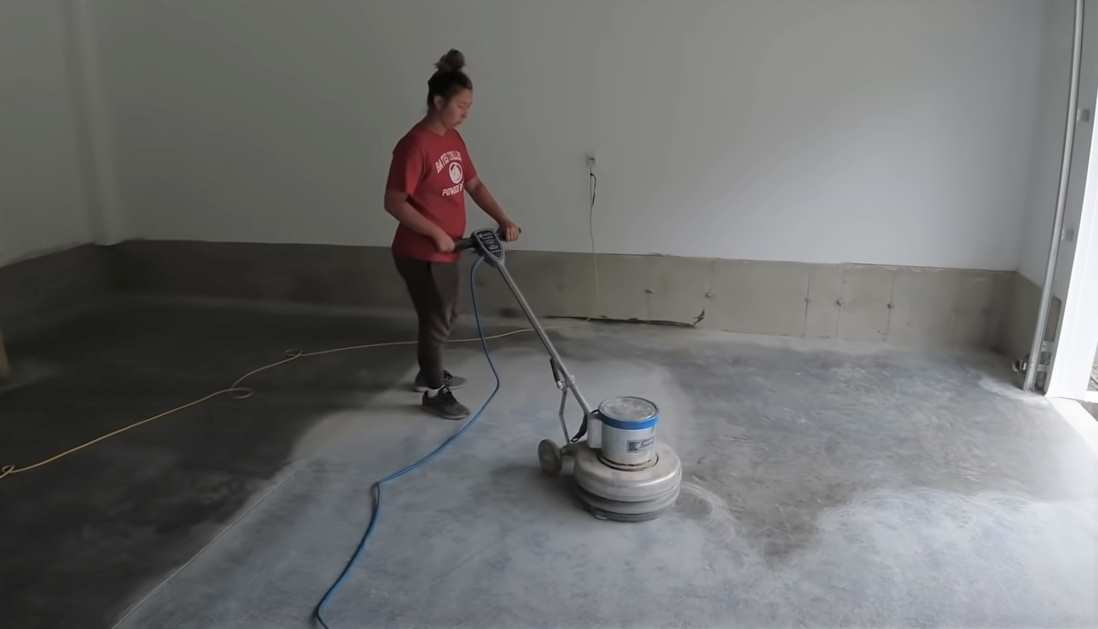
These methods can be used to remove minor imperfections, level the surface, or create a polished look. Here's how to sand and buff concrete, along with the tools and methods involved:
1. Tools: To sand and buff concrete, you will need sanding pads or discs, which can be attached to a hand-held orbital sander or a floor buffer, depending on the size of the project.
- Sanding pads or discs come in various grit levels, ranging from coarse (around 30-80 grit) to fine (200-400 grit), allowing you to achieve different levels of smoothness. For a highly polished finish, diamond polishing pads can also be used, which are available in even finer grits (up to 3000 grit).
2. Methods: Start by cleaning the concrete surface, and removing any debris, dirt, or loose material. Then, select the appropriate grit level for your sanding pad or disc, depending on the current condition of the concrete and the desired finish.
- For rough surfaces, begin with a coarser grit and work your way up to finer grits as the surface becomes smoother.
3. Sanding process: Attach the chosen sanding pad or disc to the orbital sander or floor buffer. If using an orbital sander, hold it firmly with both hands and move it in a circular motion across the surface, applying even pressure.
- Overlap each pass slightly to ensure a uniform finish. For a floor buffer, start the machine and guide it across the surface using a side-to-side motion. Work in small sections, overlapping each pass to achieve a consistent finish. In both cases, make sure to keep the tool moving to avoid creating uneven spots or gouges in the concrete.
4. Progression: As the concrete surface becomes smoother, switch to progressively finer grit sanding pads or discs. This gradual transition helps to refine the surface and create smooth and shiny concrete.
- If you're aiming for more of a glossy shine, you can transition to using diamond polishing pads, which are available in even finer grits (up to 3000 grit).
5. Cleanup: After completing the finishing process, thoroughly clean the concrete surface to remove any dust or debris generated during the process.
- This step is crucial for achieving a pristine finish and ensuring proper adhesion if you plan to apply a sealer or coating.
6. Sealing (optional): If desired, you can apply a concrete sealer to protect and enhance the appearance of the newly smoothed surface.
- A sealer can provide additional protection against stains, water penetration, and other potential issues, while also adding a polished look to the concrete.
3. How To Smooth a Concrete Floor with a Concrete Overlay
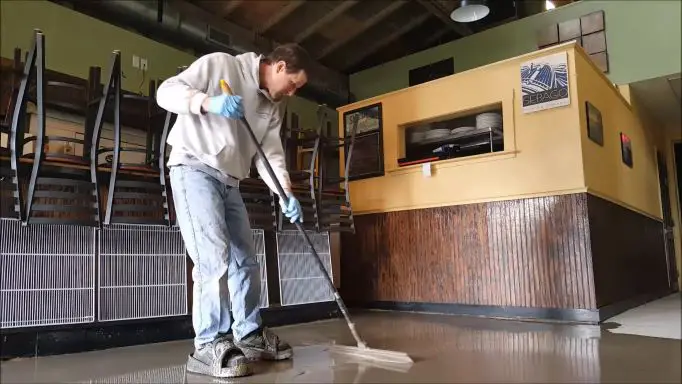
A thin overlay or micro-topping is an effective solution for smoothing rough concrete floors, patios, sidewalks, or driveways.
These products are designed to provide a thin, durable, and attractive layer on top of existing concrete, hiding imperfections and creating a smooth, even appearance. Micro-toppings are typically made from a blend of polymer-modified cement, fine sand, and other additives that provide flexibility, strength, and adhesion to the underlying concrete.
Before applying a thin overlay or micro-topping, it is essential to thoroughly clean the entire surface, removing any loose material, debris, dirt, and existing coatings or sealers. It is also crucial to repair any significant cracks, holes, or surface damage using a suitable patching compound.
Proper surface preparation is vital for ensuring strong adhesion between the micro-topping and the underlying concrete. In some cases, a primer or bonding agent may be required to improve adhesion further.
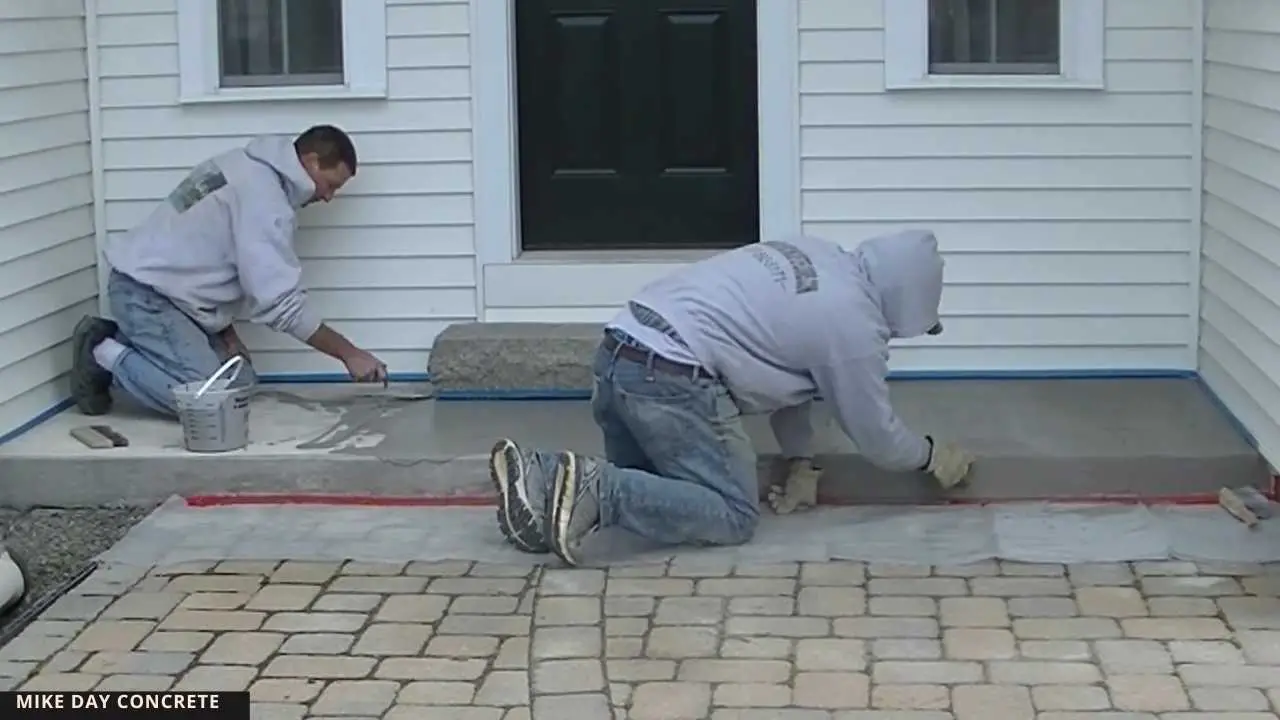
To apply the micro-topping, mix the product according to the manufacturer's instructions, ensuring a smooth, lump-free consistency. Using a trowel, squeegee, or roller, spread the mixture evenly across the surface, maintaining a thickness of approximately 1/16 to 1/4 inch (1.5 to 6 mm).
The application method may vary depending on the specific overlay product and desired concrete smooth finish. Some micro-toppings can be applied in multiple thin layers, allowing you to build up the thickness and smooth out concrete in bad conditions. Allow each layer to dry according to the manufacturer's recommendations before applying the next one.
Once the micro-topping has fully cured, it can be sealed with a high-quality concrete sealer to protect the surface and enhance its appearance. The sealer can provide additional protection against stains, water penetration, and wear, while also imparting a polished or glossy finish, depending on the product selected.
Overall, a thin overlay or micro-topping is a convenient and effective method for transforming a rough concrete floor or surface into a smooth, visually appealing, and durable surface.
Learn how to fix and smooth rough concrete in The Concrete Underground.
4. How To Smooth A Concrete Floor using a Self-Leveling Compound
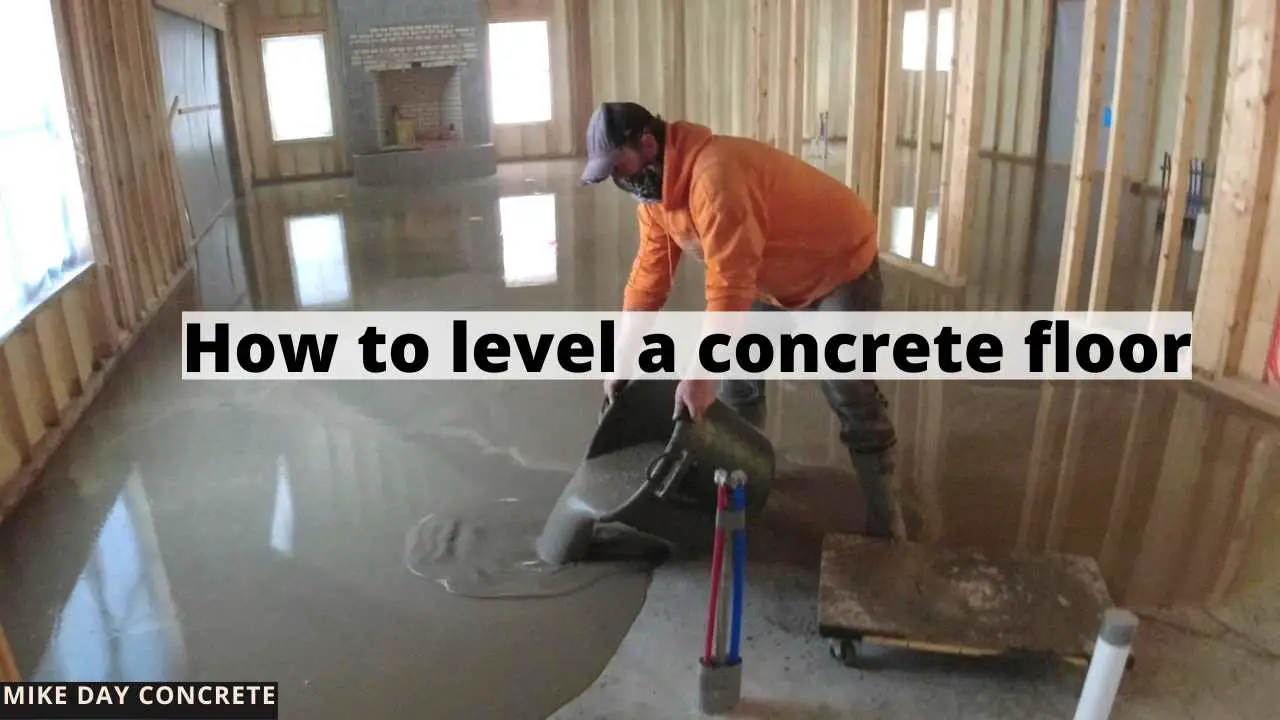
A self-leveling compound is an ideal solution for smoothing concrete when the primary concern is an uneven, rough, or sloped floor. This type of overlay is designed to self-level an uneven floor in a range of thickness from 1/8" to 2" when poured, providing a smooth, level, and flat surface without the need for extensive manual labor.
Self-leveling compounds are typically used in indoor spaces, to correct uneven floors before installing floor coverings like tile, carpet, or hardwood. They can also be used on garage floors or other large, flat surfaces where having smooth concrete is essential for functionality and aesthetics.
The primary advantage of using a self-leveling compound is that it simplifies the process of leveling and smoothing concrete, as it naturally flows and settles to create a flat, even layer.
Before applying a self-leveling concrete mix, it's crucial to clean the concrete thoroughly, removing any dirt, debris, or existing coatings. Fill any cracks or holes with a patching compound, and allow it to cure fully.
In some cases, a primer or bonding agent may be necessary to promote better adhesion between the self-leveler and the underlying concrete. Follow the manufacturer's instructions for preparing the surface and applying the primer, if required.
how do you resurface uneven and rough concrete
To use the self-leveling concrete, mix the product according to the manufacturer's directions, ensuring a smooth, pourable consistency. Pour the mixture onto the concrete surface, starting from the lowest point and working your way up.
The mix will flow and spread across the surface, naturally seeking the level plane. Use a spreader or squeegee to help guide the material, ensuring even coverage and filling any low spots. Allow the self-leveling compound to cure before walking on it or installing any floor coverings.
By using a concrete self-leveling concrete, you can quickly and easily make concrete smoother, providing an ideal surface for further finishing or floor covering installation.
5. How To Smooth Exterior Concrete with a Resurfacing Material
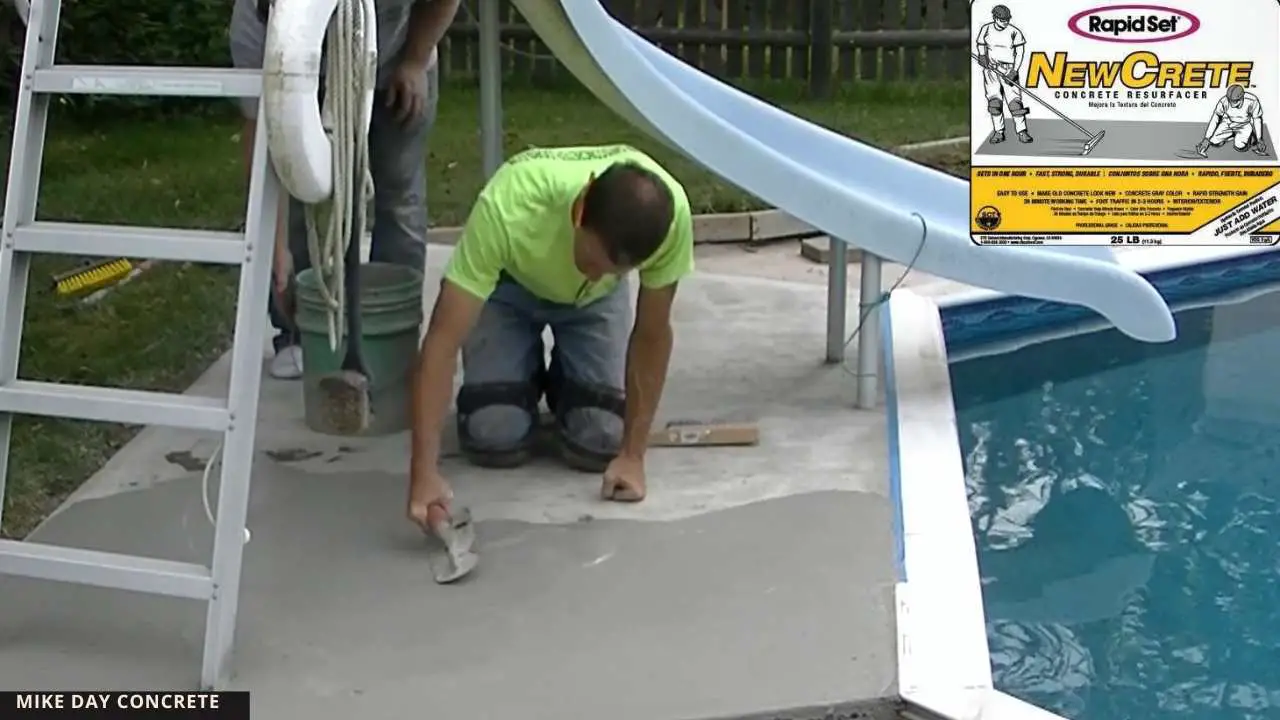
A concrete resurfacer is a specially formulated product designed to repair and restore the appearance of existing worn or scaled concrete patios, sidewalks, pool decks, and driveways.
This product is composed of a unique blend of Portland cement, sand, polymer, and other additives, which work together to create a shrinkage-compensated repair material.
Concrete resurfacers, such as NewCrete Concrete Resurfacer, are intended to provide a durable, wear-resistant surface over old, worn, rough, or scaled concrete.
The concrete resurfacer can be applied in a range of thicknesses, from a feather edge of 1/16 inch (1.6 mm) up to 1/2 inch (13 mm). The product offers superior bond strength to the existing concrete, ensuring a long-lasting and reliable repair.
The application process involves using a squeegee, trowel, or brush to spread the resurfacer evenly over the surface, providing exceptional flow and a smooth finish.
After applying the concrete resurfacer, it's essential to allow sufficient time for it to cure. Typically, you can walk on the resurfaced area in as little as 8 hours, while driving on it is possible after 24 hours.
By using a concrete resurfacer, you can quickly and effectively achieve concrete smoothing while fixing worn or scaled concrete, creating a durable, attractive, and wear-resistant finish.
6. How to Smooth Rough Concrete Edges and Surface Areas
Using concrete patching materials to smooth concrete after it dries offers several benefits. Patching materials can effectively fill in cracks, holes, and other surface imperfections, creating a more uniform and smooth concrete appearance.
Sakrete Pro-Mix All Purpose Cement Mix is a high-performance, fast-setting, and non-shrink concrete repair material that offers both durability and rapid strength gain.
This versatile product can be used for both vertical and horizontal repairs, either above or below grade, making it ideal for various applications such as column bases, concrete repair, concrete floors, highways, industrial floors, and concrete stairs.
To patch and repair concrete using the Pro-Mix All Purpose Cement Mix, start by mixing only the amount of material that can be placed within 15 minutes, as this product sets quickly.
It's essential not to apply the mix over concrete that is less than 28 days old, frozen, or contains frost. Additionally, avoid bridging over existing expansion or control joints.
Once the mix is prepared, place it into the damaged or rough area and compact it to eliminate any voids. Finish the surface smooth with a trowel or float, or use a broom finish for a more textured look.
By using Sakrete Pro-Mix All Purpose Cement Mix, you can effectively patch, repair, and smooth concrete edges or flatwork, resulting in a smooth and durable finish.
7. How Do You Get A Glossy Finish On Concrete?
Concrete polishing is a process that smooths and refines concrete after it dries by mechanically grinding, honing, and polishing the material.
This technique utilizes progressively finer grit diamond-impregnated abrasive discs or pads to make concrete smooth, remove surface imperfections, and create a smooth, shiny, and glossy finish.
Polished concrete is not only visually appealing but also durable and low-maintenance, making it an ideal choice for various residential and commercial applications.
Top 10 tools you can use to smooth concrete?
- Concrete grinder: A powerful tool used for grinding down rough surfaces and removing imperfections, available in handheld or walk-behind models.
- Diamond abrasive discs/pads: Attachments for grinders or polishers, designed to smooth and polish hardened concrete using progressively finer grits.
- Handheld concrete planer: A tool used for removing high spots, leveling uneven surfaces, and cleaning old or damaged concrete.
- Concrete scarifier: A machine equipped with rotating cutting wheels that remove a thin layer of hardened concrete to create a smooth, even surface.
- Sanding block or orbital sander: Handheld tools with abrasive pads or sandpaper used to smooth minor imperfections or rough areas on smaller-scale projects.
- Concrete polishing machine: A specialized tool that mechanically grinds, hones, and polishes concrete surfaces to achieve a smooth, glossy finish.
- Floor buffer: Machine with a rotating swing plate are used for grinding and polishing concrete to enhance its appearance and smoothness.
- Cold Chisel and Hammer: Basic hand tools used to chip away and remove small areas of hardened excess concrete, useful for minor repairs or adjustments.
- Concrete rubbing brick or Rubbing stone: Used to manually smooth rough edges, remove small imperfections, and even out surface irregularities on hardened concrete surfaces.
- Needle scaler: A pneumatic tool with a set of needle-like attachments that vibrate to remove scale, rust, and other surface imperfections from hardened concrete surfaces.
frequently asked questions about concrete smoothing:
How Long Do You Wait to Smooth Rough Concrete?
If you are smoothing hardened concrete, you should wait until the concrete has completely cured before using tools like grinders or polishers. Curing times can vary, but most concrete reaches its initial strength after about 24 hours and achieves approximately 70% of its total strength after 7 days. For optimal results and durability, it is generally recommended to wait at least 28 days before smoothing fully cured concrete.
How Much Does a Concrete Grinder Remove?
The amount of concrete removed by a concrete grinder depends on several factors, including the type of grinder being used (handheld or walk-behind), the diamond abrasive disc's grit size, the grinder's power, and the operator's skill level.
Generally, concrete grinders can remove anywhere from 1/16 inch (1.6 mm) to 1/4 inch (6.4 mm) of concrete with multiple passes over the entire area.
How much concrete is removed and how long it takes is very dependent on the hardness of the concrete after it dries.
Pros & Cons of Dry Grinding vs. Wet Rubbing
Both wet grinding and dry grinding have their own advantages and disadvantages when it comes to smoothing concrete, and the choice between the two depends on the specific requirements of your project.
Wet grinding:
- Reduces dust: Wet grinding helps suppress airborne dust, providing a cleaner working environment.
- Keeps the surface cool: Water helps to cool down the concrete surface and the diamond abrasives, reducing the risk of overheating and damage.
- Longer tool life: Wet grinding can extend the lifespan of the diamond abrasives by reducing friction and heat.
- Disadvantage: Wet grinding can create a slurry, which may require additional cleanup efforts and disposal, adding to the overall workload.
Dry grinding:
- No slurry: Dry grinding does not produce a slurry, resulting in easier cleanup and disposal.
- Faster setup: There is no need to set up a water supply, allowing you to start working more quickly.
- Better for some coatings: In some cases, dry grinding is preferred for the application of certain surface coatings, as the surface is left completely dry.
- Disadvantage: Dry grinding generates more dust, posing potential health risks and requiring the use of dust extraction equipment to maintain a safe working environment.
Can you pour concrete over concrete to level and smoothen it?
Yes, you can pour concrete over existing concrete to level and smooth it. This involves pouring a thin, top layer of new concrete over the old concrete to create a smooth, and level finish.
Before pouring concrete over concrete, there are a few important steps to follow:
- Clean the surface: Remove any dirt, debris, oil, or grease from the existing concrete to ensure proper bonding between the old and new layers.
- Repair cracks and damage: Address any cracks, holes, or other damage in the existing concrete to prevent them from affecting the new layer.
- Prepare the surface: Use a bonding agent or a primer to help the new concrete adhere to the old surface. This step is crucial for achieving a strong bond and preventing delamination or peeling.
- Mix and apply the new concrete: Choose a suitable concrete mix and apply it over the old concrete. Make sure to spread it evenly and smoothly, using tools such as a trowel, screed board, and a bull float.
- Finish and cure: Finish the new concrete layer using appropriate techniques and tools (e.g., power trowel, hand troweling, broom finishing, or stamping). Allow the new layer to cure properly before using the surface.
Keep in mind that pouring concrete over concrete is suitable for minor leveling and smoothing jobs. If the existing concrete has significant damage, structural issues, or substantial height differences, other methods, such as concrete replacement or the use of self-leveling concrete, might be more appropriate.
In Conclusion: "How to smooth concrete after it dries"
Various techniques can be employed to achieve the desired results, such as grinding, sanding, applying self-leveling compounds, concrete overlays, patching and repair, concrete polishing, and concrete resurfacing.
The choice of method depends on the specific needs of your project, the condition of the existing surface, and the desired level of smoothness and finish. By carefully selecting the appropriate tools and materials, and following the proper preparation and application procedures, you can transform a rough and uneven concrete surface into a smooth surface area.
Learn how to fix and repair concrete from me in The Concrete Underground.
My most popular pages:
