BUILDING CONCRETE STEPS
Building concrete steps doesn't have to be difficult. If you want to learn how to build concrete steps just follow this step by step guide.
This concrete step building guide will cover laying out the size, preparing the sub-base, building the forms, pouring, finishing and curing the concrete from start to finish.
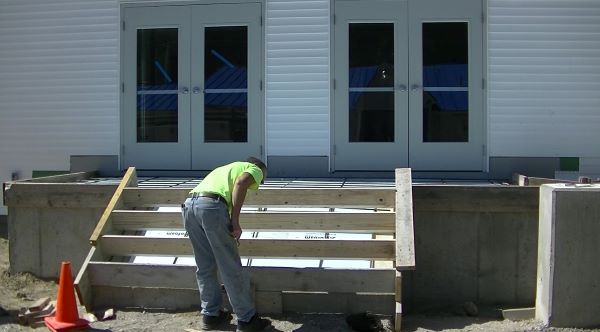
After reading through this guide you'll have a lot better understanding about what skills and time it takes for building concrete steps all by yourself.
My videos at the bottom of the page will show you how I do it and will give you a good idea if building the concrete stairs is something you want to do yourself or hire a professional to do it for you.
"NEW" This EASY LAYOUT TOOL for cutting your stair stringers takes all the guess work out of it for you. It also comes with it's own step by step video showing you how to use it. I HIGHLY RECOMMEND IT if you're attempting to build your own concrete stairs.
Mike
HOW TO BUILD CONCRETE STEPS:
STEP 1. FIGURING THE SIZE of your concrete steps. Before you start building concrete steps, check with your local building codes to make sure you comply with any dimensions they require. Keep in mind you will also need to look into what is required for handrails.
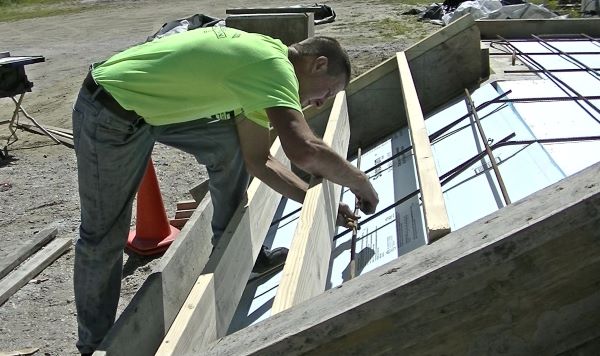
A "riser" is the vertical face of the step and a "tread" is the horizontal surface of the step. To determine the overall size of the concrete stairs the first thing you need to do is calculate the total rise and run of the steps you are building.
Measure the distance from the ground to where you want the landing or top platform of the steps. This measurement is the total rise of the stairs.
For example, if the total rise is 28 inches then 4 risers of 7 inches will work just fine. If the total rise is 24 inches then 4 risers of 6 inches would work. A comfortable riser is usually anything between 6 - 8 inches.
After you figure the amount of risers you will need you can figure the run. Each tread should be at least 12 inches deep for a rise of 6 - 8 inches. The top tread or landing should be wide enough to comfortably stand on if the steps lead to an entry.
For the example above, if the top landing is 36 inches and the remaining 3 treads are 12 inches, the total run of the concrete steps is 6 feet out from the face of the building. If this is too far then adjust the top landing to fit your needs.
STEP 2. PREPARING THE BASE is a very important step when building concrete steps. After you know the rise and run of your concrete steps you can decide on a width. The width should be at least 6 inches wider than the doorway on each side.
Level all the ground in front of the door at least 6 inches wider than the size of the concrete stairs. Dig down and remove any grass or topsoil to a depth of at least 6 inches.
After you've removed the topsoil and leveled the area, fill the area with gravel or crushed rock. Compact the newly filled material with a hand tamper to give you a solid base to begin with.
If you live in a cold climate area, laying down 2 inches of styrofoam before filling with gravel will help keep the frost from getting under the stairs and moving them up and down.
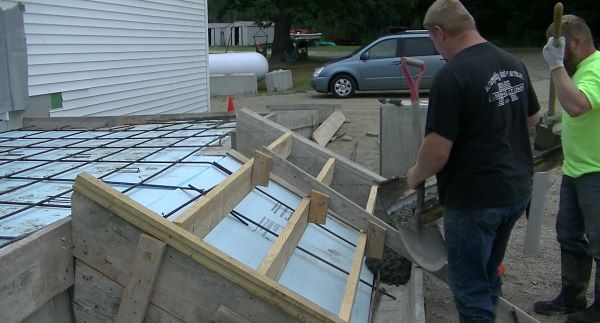
STEP 3. BUILDING THE FORMS for the concrete stairs. You can use either 3/4 inch plywood, 2x8's, or 2x6's to build the forms for the concrete stairs. The rise and run of the stairs will determine which material is best to use.
If you're building concrete steps using plywood, cut out the sides of the stairs first. Measure and cut according to the total rise and run of the stairs that you determined in STEP 1. When you're done the plywood should look like a silhouette of the stairs.
If using 2x8's, cut the bottom length first as this will be the longest, then stack the remainder 2x8's on top according to the run (12 inches less) than the one underneath it. Screw them together using 2x4's and this will give you your sides.
Once the side forms are done, set them in place, plumb them, and drive 2x4 stakes into the ground on the outside of the forms to hold them in place. Attach the risers to the side forms using nails or screws. You may have to rip the 2x8 if the rise is less than 7 1/2 inches and more than 5 1/2 inches (2x6).
After the forms are nailed, staked, and set in place, level them with a builders level or laser level. Keep in mind the stairs should pitch slightly away from the house so water will run off and not puddle.
Use plenty of 2x4 braces to keep the forms from bowing as the weight of the concrete will want to push the forms outward.
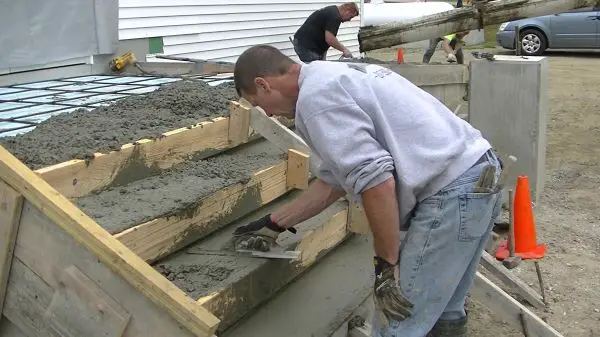
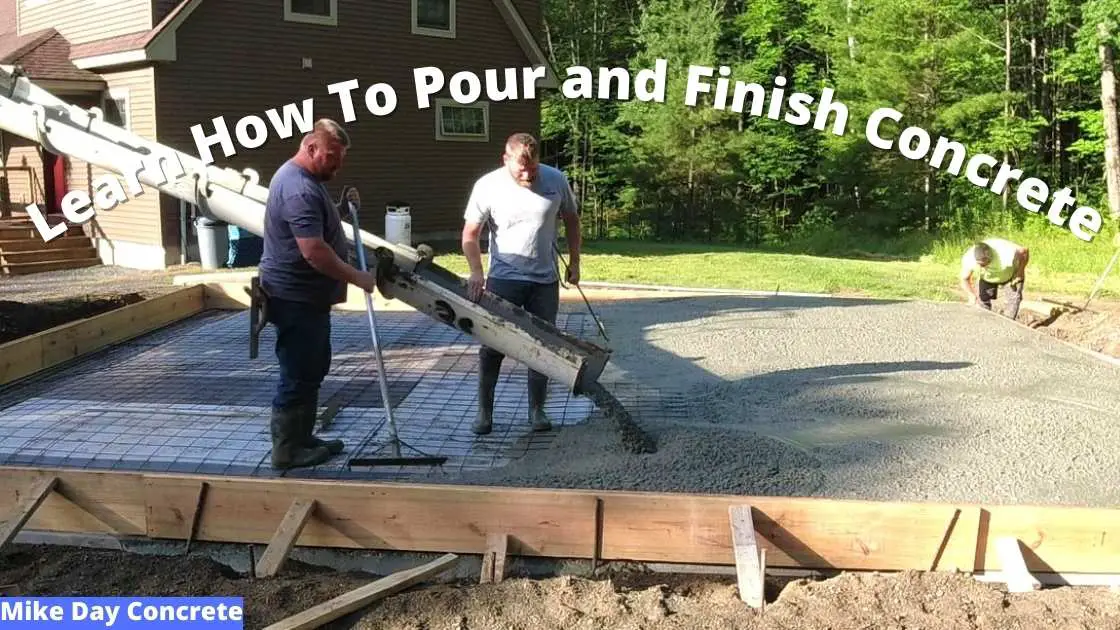
STEP 4. POURING THE CONCRETE into the concrete stairs. Building concrete steps can be done by mixing the concrete from bags you buy or calling a redi-mix concrete company and having them deliver the concrete pre-mixed on a concrete truck.
Having done both, if the stairs figure out to more than 20 bags of concrete, I would suggest calling a redi-mix concrete company. It is much less labor intense and whole lot faster than mixing by hand.
Start pouring the concrete into the bottom step first. Consolidate the concrete by tapping the outside of the forms with a hammer and spading the concrete with a shovel on the inside of the forms.
Continue this process with each step, leveling with the top of the forms, until you have filled the forms to the top.
Some of the concrete may sag under the risers as you are pouring, don't worry this is normal. let the concrete sit for 20 - 30 minutes and strike them off again. It should be stiff enough to hold without sagging by now.
Use a hand float to smooth out the surface of the concrete and bring the "cream" to the top. Let this sit for a while until all the bleed water has dissipated.
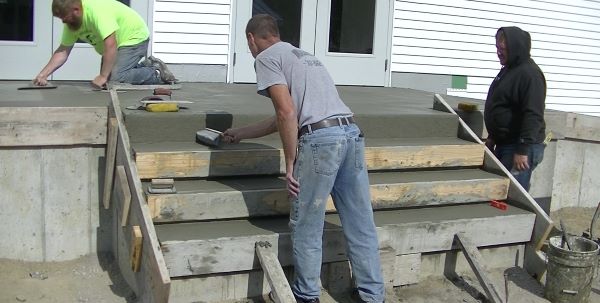
STEP 5. FINISHING THE CONCRETE - Putting the final finish on the
concrete is key to having a nice looking set of stairs.
The concrete should be dry enough so no water is visible on the surface of the concrete and moist enough to work up some cream when you trowel the surface.
After you have troweled the surface smooth use a broom and drag it across the surface of the concrete to give it a non-skid texture.
Remove the riser boards, make sure the concrete is set up enough so the concrete doesn't sag or dip. (approximately one hour after you poured them).
Once the riser boards are removed you can trowel this surface and broom it or use a wet sponge to work up some cream and sponge out any air pockets and voids. The sponge will give you a unique texture that is slightly different than the broom texture.
STEP 6. CURE THE CONCRETE by keeping it wet. After the finishing process, let the concrete set over night.
The next day, remove the side forms, patch any voids with a concrete patch material and keep the concrete wet by hosing it with water. The longer you keep it wet the better it is for the concrete (2 - 5 days if possible).
After a couple weeks you can apply a concrete sealer to protect the concrete and help make them easier to clean.
Building concrete steps can be fun. Take your time and double check all your measurements, use plenty of braces and find someone to help. Pouring concrete is always easier with an extra person.
Forming Concrete Steps and a Concrete Patio
This video will show you how I form a set of concrete steps with an attached patio slab.
Pouring and Finishing Concrete Steps along with an attached Patio Slab
Watch us pour the concrete for these concrete stairs and the attached patio slab.
Then see how we finish the concrete for both the stairs & patio.
For more information about steps and stairs made with concrete:
Click on CONCRETE PORCH STEPS to see some more great ideas.
Click on PREFAB CONCRETE_STEPS to learn about the advantages of prefab concrete stairs.
Click on PRECAST CONCRETE STEPS to learn more about these beautiful steps.
